Plant Care
Houseplant Root Rot: How to Spot It, Treat It, and Prevent It
It usually starts with good intentions. The soil looks dry on top, so you water. A few days later the leaves droop, so you water again. By the time the plant is yellowing from the bottom up, the roots below the surface have been sitting in wet soil for two weeks — and the problem is no longer about the leaves at all. Root rot is less a disease that strikes from nowhere and more a slow collapse that happens out of sight. The good news: it is one of the most fixable houseplant problems, provided you catch it before the stem goes soft.
Why roots rot in the first place
Roots need air as much as they need water. In a pot, that air lives in the small pore spaces between soil particles. When those spaces stay filled with water for days on end, the roots suffocate, the outer tissue dies, and fungi and bacteria that thrive in damp conditions move into the dead material. What is left is a root system that can no longer move water up to the leaves. The plant wilts — and looks thirsty — because its plumbing has failed, not because it needs another drink.
Overwatering is the usual culprit, but it rarely acts alone. A pot with no drainage holes, a heavy peat-based mix that holds water like a sponge, a decorative outer pot where water collects at the bottom, or a saucer that is never emptied will all produce the same result even if you water sparingly. Watering on a fixed weekly schedule through winter, when the plant is barely growing, does it too.
The early warning signs most people miss
The first clues are easy to misread. A plant with rotting roots often looks underwatered, so the instinct is to water more, which accelerates the damage. Look for a combination of signals rather than a single one:
- Lower leaves turning yellow and soft, while the newer growth stays green.
- Wilting that does not improve a day after watering — or that gets worse.
- Soil that is still damp two or three centimetres down a week or more after watering.
- A musty, sour smell when you lift the pot or dig into the mix.
- Brown or black patches on the stem right at the soil line, soft to the touch.
- Translucent, water-soaked spots on leaves, especially near the base of the plant.
- A sudden swarm of fungus gnats, which favour consistently wet soil.
Compare that with a genuinely thirsty plant: it droops evenly, the soil is dry well below the surface, and it perks up within hours of a proper watering. Old leaves also yellow and drop as a matter of course — but one or two at a time, on a plant whose soil dries out normally.
Confirming it before you act
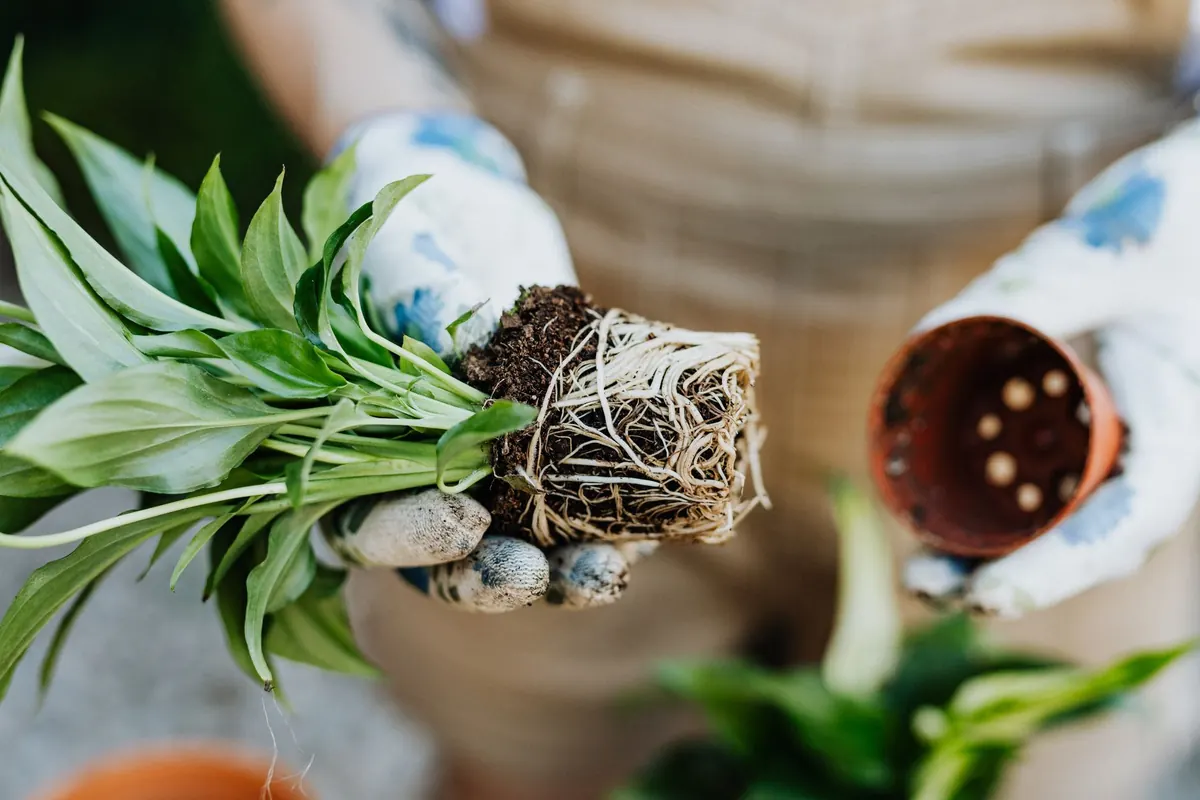
You cannot diagnose root rot from above the soil. Slide the plant out of its pot, supporting the base of the stem with one hand, and look at the root ball. Healthy roots are firm and pale — white, cream, or tan. They may be stained brown by the soil itself, which is fine as long as they feel solid. Rotten roots are brown or black, mushy, and often have a papery outer sheath that slips off between your fingers, leaving a thin stringy core. That smell is unmistakable once you have met it.
Treating root rot: a step-by-step rescue
Work at a table or sink, and give yourself twenty minutes. Speed is not the point; clean cuts are.
- Unpot and clear the soil. Gently shake and tease away as much of the old mix as you can. Rinsing the roots under room-temperature water makes the damage much easier to see.
- Trim back to healthy tissue. Using clean, sharp scissors or secateurs, cut away every soft, dark, or stringy root. Cut into firm, pale tissue. If the central core is stringy, cut higher up until you reach solid material — a smaller root system is far better than a larger rotten one.
- Clean your tools between plants. Wipe the blades with rubbing alcohol if you are treating more than one plant, so you are not carrying the problem from pot to pot.
- Check the stem. If the rot has moved into the stem and the base is soft and dark, trimming roots will not save it. Take healthy cuttings from above the damage and start again.
- Repot into fresh mix. Use new, free-draining potting soil, and choose a pot only a centimetre or two wider than the root ball. An oversized pot holds excess wet soil that the roots cannot use. Make sure it has drainage holes.
- Water lightly once, then leave it alone. Settle the mix around the roots and stop. Do not water again until the top few centimetres are dry.
Some growers dust the cut ends with cinnamon, which is mild and does no harm. Clean cuts, fresh air and dry soil matter more.
The first month after the rescue
Keep the plant in bright, indirect light — not direct sun, which will scorch a plant that has just lost much of its root system. Hold off fertiliser for at least four to six weeks; damaged roots cannot handle the salts, and feeding encourages leafy growth the plant cannot yet support. Expect some leaf loss. A plant that was severely affected may look worse before it looks better, and a slow, cautious recovery over several weeks is normal. New growth, however small, is the sign you are waiting for.
Watering habits that prevent rot
Prevention comes down to one principle: water thoroughly, then let the soil dry to the right depth before watering again. How deep depends on the plant. Succulents and cacti want the mix dry almost all the way through. Most tropicals prefer the top two or three centimetres to dry out. Ferns and calatheas want it consistently moist but never sodden.
- Check before you water, not on a schedule. Push a finger in to the second knuckle, or lift the pot and judge its weight — a light pot is a dry pot.
- Water until it runs out of the drainage holes, then empty the saucer. Shallow sips leave dry pockets and salt build-up.
- Skip the decorative cachepot for watering, or tip out any water that collects in it after twenty minutes.
- Match the mix to the plant. Add perlite, bark or coarse grit for anything that likes to dry out; use a finer, water-retentive mix for ferns and peace lilies.
- Water in the morning where you can, so the surface dries before the cooler night.
- Cut back in winter. Shorter days and slower growth mean the soil stays wet far longer than it did in June.
The two-minute pot check
Once a month, pick up each pot. If it feels heavy and the soil smells earthy in a bad way, wait a few more days. Look at the drainage hole — are there roots circling out of it, or white crust on the rim? Check that the saucer is dry. That small routine catches most problems before they cost you a plant, and it takes less time than reading about them.
Related Articles