DIY Gardening
How to Build a No-Dig Raised Bed in One Weekend
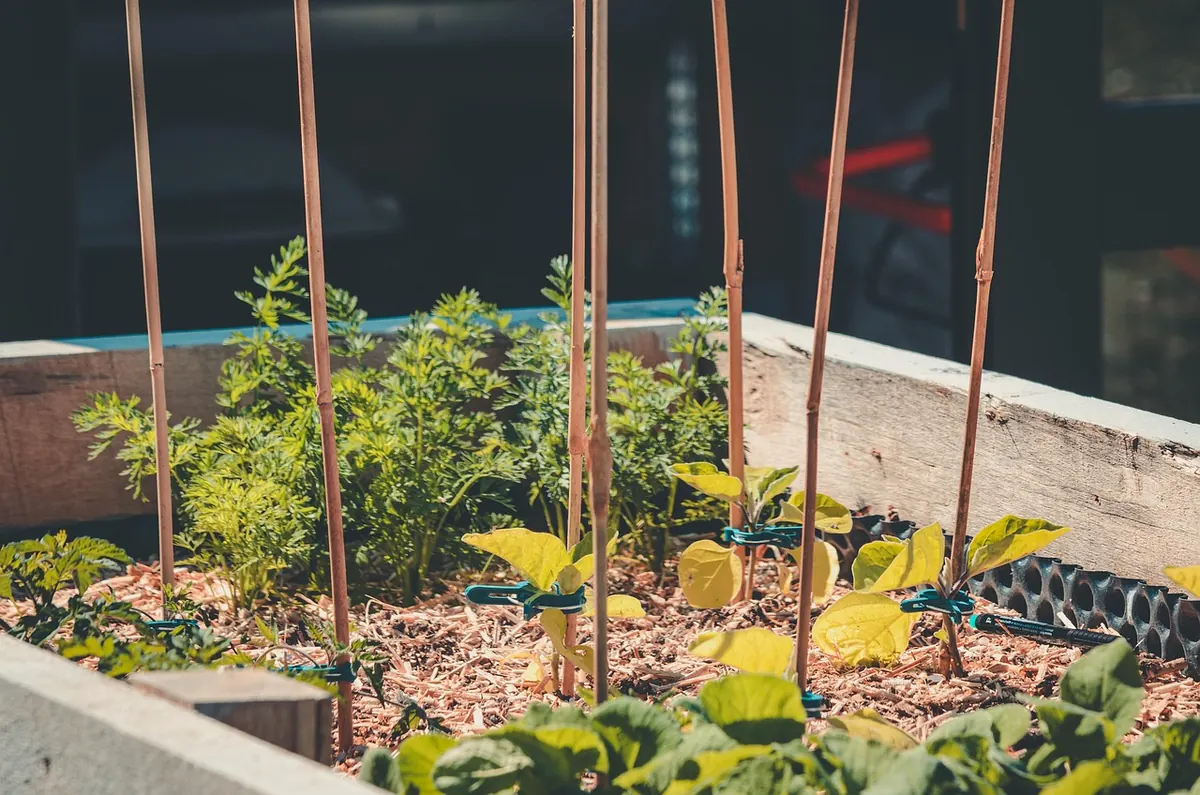
A raised bed built without digging is one of the few garden projects that rewards you immediately. You get a defined growing area, soil you can actually work with, and a frame that keeps grass and gravel out of your carrots. The no-dig part means you never turn the soil over: you smother what is there, layer organic matter on top, and let worms and roots do the structural work. Done at a sensible size, the whole thing fits into a weekend, with Sunday afternoon free for planting.
Why no-dig suits a raised bed so well
Digging destroys the fungal networks and worm tunnels that already exist in your soil. In a raised bed you are starting from a blank surface anyway, so there is nothing to preserve by digging and everything to gain by not doing it. Cardboard kills off the grass or weeds underneath by blocking light, then breaks down into worm food within a couple of months. Your layers of compost on top become the growing medium.
There is a second, more human reason. Digging a bed properly is hard, slow work, and most of us have a Saturday morning's worth of energy, not a fortnight's. No-dig lets you build something productive in the time you actually have, then improve it year after year by adding a few centimetres of compost each autumn.
What you need before Saturday
Buy or scrounge everything in advance. A build that stalls halfway through because you ran out of screws is how weekend projects turn into month-long eyesores.
- Timber for the frame. Four boards of 25–30 cm depth. Larch, cedar, or untreated oak last well; standard treated timber is fine for beds, but avoid old railway sleepers and any reclaimed wood of unknown origin, especially near edibles.
- Corner posts. Four lengths of 5 × 5 cm timber, cut slightly taller than your boards, to hold the corners square.
- Galvanised screws, long enough to bite through the board into the post. About 60–70 mm usually does it.
- Cardboard. Plain brown, no glossy print, all tape and staples removed. Flattened removal boxes are ideal. You need enough to cover the bed's footprint with generous overlaps.
- Soil ingredients — see the mix below.
- Tools: a saw, a drill or screwdriver, a mallet, a spade, a wheelbarrow, a rake, and a hose or watering can.
- Optional but useful: a length of membrane or landscape fabric for the paths, and a bag of mulch.
Choose the site and fix the dimensions
Pick a spot that gets sun for most of the day — six hours is a reasonable target for vegetables — and that you can reach with a wheelbarrow. Avoid the lowest corner of the garden if it floods, and keep a metre of clear space around the bed so you can kneel and swing a rake.
Keep the width to 1.2 m. That sounds narrow, but it means you can reach the middle from either side without stepping on the soil, and not treading on the bed is half the point of no-dig. Length is flexible: 2.4 m is a good balance between growing space and the cost of filling it. A bed 1.2 × 2.4 m and 25 cm deep will take roughly three-quarters of a cubic metre of material to fill, so order accordingly.
Mark the outline with stakes and string, then check it is square by measuring the diagonals — they should match.
Saturday morning: build the frame
Clear the footprint of anything tall and woody, but leave short grass and weeds where they are. The cardboard will deal with them.
- Set the four corner posts at the marked corners, driving them a little into the ground with the mallet.
- Screw the first board to the outside of the posts, checking with a spirit level as you go. If your ground slopes, decide now whether to level the boards on top and let the bottom edge follow the ground — it looks better than a wobbly top line.
- Add the remaining boards, working around the frame and keeping the corners square.
- Line the inside walls with a single layer of cardboard if you are using timber that might dry out quickly; it holds moisture against the wood.
Do not nail a base onto the bed. You want drainage and worm access, and the ground beneath will improve on its own.
Saturday afternoon: cardboard, then soil
Lay the cardboard over the entire base, overlapping the edges by at least 15 cm and running it up the inside walls by a few centimetres. Wet it thoroughly as you go — dry cardboard repels water and can stay dry for weeks. A hose on a soft spray is quicker than a watering can here.
Now the fill. Do not use pure compost; it shrinks, dries out, and provides little structural support for roots. A simple, reliable mix by volume:
The soil mix
- Two parts screened topsoil — the body of the bed.
- Two parts compost — homemade, or a good bought green-waste compost.
- One part leaf mould or well-rotted manure — for moisture retention and slow feeding.
Skip peat-based products; they are hard to justify in a vegetable bed and the alternatives work well. Fill the bed to within 3–4 cm of the top edge, then rake it level and water it in stages so the layers settle rather than slumping later. Expect the level to drop several centimetres over the first month — keep a barrow of spare mix to top up.
Sunday: plant, water, mulch
You do not need to wait for the cardboard to rot. Cut a cross or a circle through it wherever you are planting something larger, then plant into the soil above.
Good first crops for a brand-new bed:
- Lettuce and salad leaves — fast, forgiving, and they cover bare soil quickly.
- Radish — up in days, which is encouraging when nothing else has appeared.
- Chard and kale — sturdy, productive over a long season, and happy in a rich mix.
- Peas and climbing beans — they fix nitrogen and give the bed structure to climb.
- Courgettes, planted as young transplants once the risk of frost has passed — one plant goes a long way.
- Herbs — parsley, coriander, thyme along an edge where you can reach them from the path.
Hold off on carrots and parsnips for the first season if your mix contains fresh manure; rich, lumpy soil makes roots fork. Potatoes are better in the ground or in bags.
Finish by watering everything in properly — a light sprinkle will not reach the roots — and mulching the bare soil between plants with 5–8 cm of compost or straw. Mulch is what keeps a no-dig bed no-dig: it suppresses weeds, holds moisture, and feeds the soil surface all season.
Mistakes that cost you a season
Building too wide is the most common one; a 1.5 m bed feels generous until you have to climb onto it. Skimping on cardboard overlap is next — a single gap and couch grass will find it. Filling with pure compost leads to a bed that dries out hard in summer and shrinks away from the sides. And watering only the surface, rather than soaking to depth once a week, produces plants with shallow roots that collapse in the first dry spell.
After the weekend
Each autumn, add 5 cm of compost to the surface and let the worms take it down. Do not dig, do not rotovate, and try not to stand on the bed. Pull weeds while they are small, keep the paths clear, and top up the mulch as it disappears. The frame will need a glance every spring — tighten a screw, check a corner — and that is about it. In two or three years the soil underneath will be darker, crumblier, and full of worms, and you will have built it without lifting a spade.
Photo: Farbsynthese / Pixabay
Related Articles